HERE ARE THE STEPS OF HOW I MADE THIS SHAKIRA…
HOPE WILL USEFULL FOR U.
[ VERSI BAHASA INDONESIA KLIK DISINI! ]
BY TONI AGUSTIAN | POPBOXWPAP.BLOGSPOT.COM
The Requirements: COREL DRAW I SUGGEST COREL DRAW X5 WHICH IS THE SMART FILL TOOL ARE ALREADY AVAILABLE + WITH THE PICKER TOOL IN IT
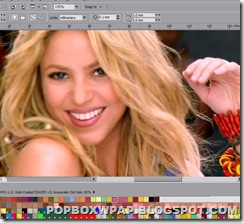 | First, choose the photo you want and bring it to the Corel Draw window, you can use import or just drag the picture to Corel’s window. resize it so fit to the paper template. adjust the brightness and contras or anything you want to make this picture better. then after you done with all those stuff, lock this picture by “right click –> lock”… and you ready for the next step. to unlock just right click the locked image and click unlock. |
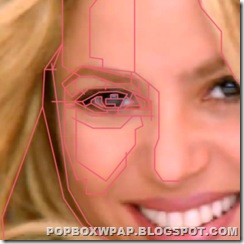 |  using the “ freehand tool“ make the connected line on every different aspect of the photo. those aspect are [ brightness, the colors differences, saturations, etc..] or you can improve the line by yourself. those lines must be connected because we’ll fill them with the color using the paint bucket or the smart fill tool. if not then the color will leak to the neighborhood area. to avoid leaking press “ALT+Z” its a shortcut to “Snap to Object”, so whenever you got close to a point it’ll be snapped. press that shortcut again to turn it off. try this step on a hardest area first like the eyes. and enough with that part for a while to take the next step…. |
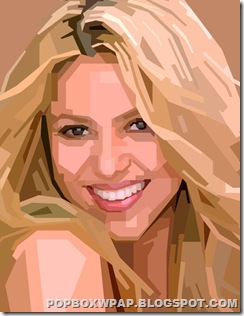 |  in this steps we’ll use so many actions using this fancy “Smart Fill Tool” from Corel. okay, now click on this tool –> then click on the color box on the property bar and click color picker, next pick the color from the area you already blocked with lines, take the  most dominant color most dominant color in that area. after picking the color the tool will change automatically to a bucket fill tool, so click it on that are where you pick that color and viola… if its not leak than you’ve made it to fill a block. |
 | after you’ve done creating all the blocks using smart fill tool then the next step is to delete all the curve lines you’ve made on the earlier step, it’ll be hard to select it one by one, I have a much better way to select it all: Click edit menu –> Find and Replace –> Find Objects… then the Find Objects Dialog appear. click begin to search and next –> click the Fill tab which is on the top of the dialog box –> Pick No Fill and press the next –> finish button –> now click Find All… and program will automatically find all the objects without fill. after all objects are selected you delete them all at once by pressing delete on the keyboard. |
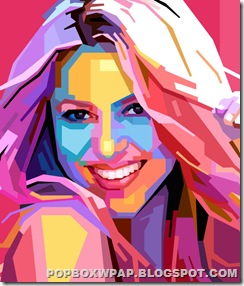 | after you’ve done picking and pouring the colors to all the blocks you’ve made. than the next step is the hardest one. its “changing the colors”. first, duplicate the picture you’ve made and make it a bitmap so it won’t be a burden to your processor. why duplicate?… read next!.. in this step I can’t explain too much. all you have to do are improvise, choose the colors whatever you want as long as still in the basic lightness area. what i meant is… the shadow color remain the shadow, the highlight color remain bright, and so on… keep coloring while still watching the duplicated picture from the previous step so you won’t be missed. do it till done, I suggest you to pick the rebel colors to push more pop art effect to this picture. try not to use the body natural colors like skin colors. Otherwise it won’t called a pop art. |
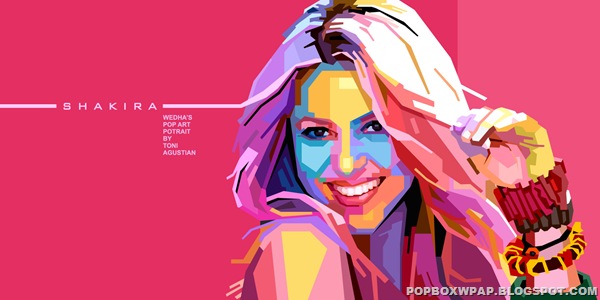 |
| the final step is making the nice layout to the picture you’ve made like placing a backgrounds, text or anything you want as long as it don’t break the beauty of the image you’ve made. I suggest you use the simple font to combine with this WPAP style. | okay, I wish this simple tutorial will help! :) if anything goes wrong or you face against the wall [ stuck] then you can contact me here of by my facebook. just click me toni agustian and ask me there! |
|
| TUTORIAL BY : TONI AGUSTIAN DATE CREATED : 2010-06-22 SOFTWARE : COREL DRAW X5 PORTABLE | |
Technorati Tags: TUTORIAL, WPAP, TEKNIK, GAMBAR, DRAWING, COLORS, HOW TO, SHAKIRA, HELP, POP ART, DIGITAL ART, TONI AGUSTIAN |


No comments:
Post a Comment